How to Use BLOB Sourced Power BI Reports via Dataflows
How to Use BLOB Sourced Power BI Reports via Dataflows
Since the announcement of Power BI dataflows in late 2018, I've had a desire to test it out and see what it could really do. I finally had the time and the proper use case to get into it and do some experimentation. Here’s what I found:
What Are Power BI Dataflows
Power BI dataflows allow you to do some self-service data prep on big data before exposing it through Power BI. My use case was somewhat simplistic, but also something that comes up fairly often and could be valuable to some organizations.
Power BI Dataflow Use Case
I have a lot of clients that get large data extracts out of their source systems. Sometimes these are full extracts, but a lot of times these are incremental daily files. A question that often comes up is, "Can I just dump these in BLOB storage and do something with them in Power BI without having to write transformations in a relational database or some ETL program?" The biggest issue with this is combining the small incremental files into a single source that Power BI can consume and use.
So, I set off on my journey to see if dataflows could help me with my problem.
Setup
There are a couple things you need to do in order to use dataflows. You will need to enable dataflows in Power BI (you must be an admin to do this).
You must also configure a workspace to use dataflows. You can either create a new workspace or update an existing one. This will not work with the My Workspace that everyone gets out-of-box.
One you have those two things configured, you're ready to start creating your dataflows. For this example, I am using the Chicago food inspection results from Kaggle. This is just a CSV that I split into multiple CSVs by year so I could test incremental data loads. I took some of the files and uploaded them to a BLOB storage container for my experiment.
Creating the Dataflow
Login to PowerBI.com and go to the workspace you created with dataflows enabled. Go to the Dataflows tab and click Create and choose Dataflow.
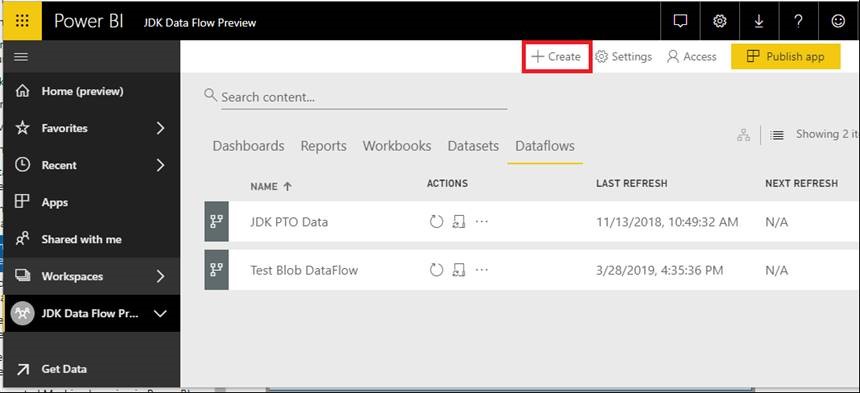
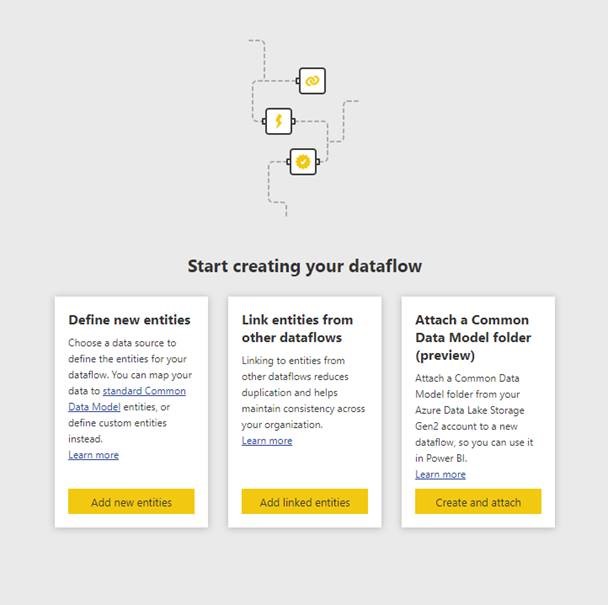
From here you can either Define new entities, link entities from other dataflows, or attach a Common Data Model folder to your dataflow. Since we are new, we are going to define new entities, so click the Add new entities button.
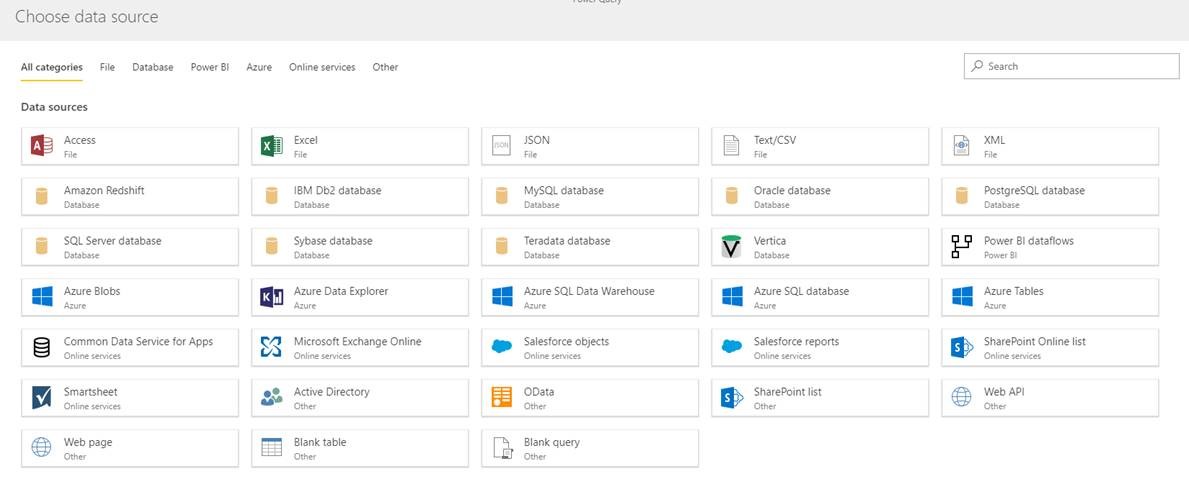
Next, you are going to see a screen that will allow you to choose from a number of different source types. For our example, we are going to be selecting Azure Blobs.
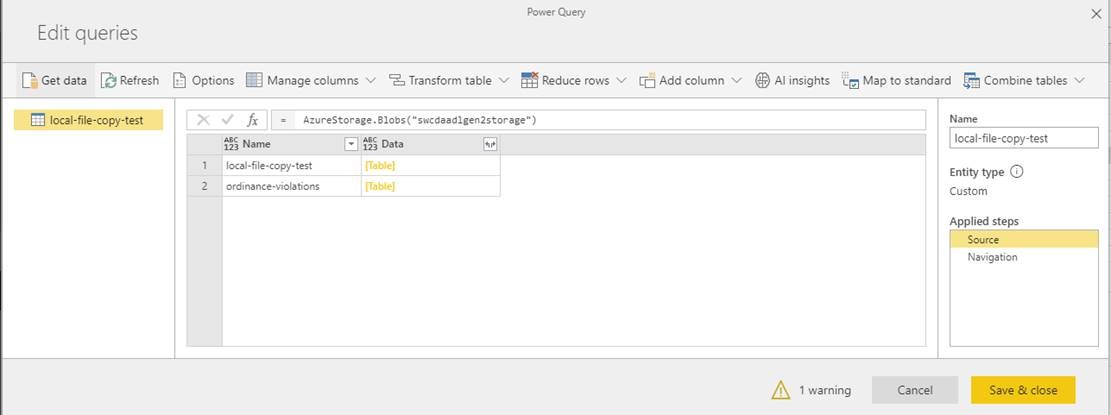
On the next screen, enter an Azure storage account and the account key so Power BI can connect to the container. My storage account is called swcdaadlgen2storage. Once Power BI connects, it will list the available containers. Click the container where that you uploaded your files to (in this example, local-file-copy-test). The result should look something like the below example. Click Next.

On the next screen, you will see the query editor. From here we will work with the query that was generated by the past couple of steps, but it will also be adding additional queries to do the joining of the files to produce the single query that Power BI will access via a Power BI report.
In the below screen shot, there are a couple things to point out that we will be focusing on.
- The queries themselves (we will end up with multiple of these) - these are in the left explorer and can perform individual steps as well as interact with each other
- Applied step editor - this is where we will be providing the commands for each step and where it will display a preview of the output for the command
- Applied steps - these are on the right side and provide all the individual steps within a query to produce the desired output
First thing to do on this page is to rename the query. For our example, let's call it Sample File. Just go to the Name textbox and enter the new value. This query is going to be just that, a sample of what all the files in the directory are going to be like in terms of columns and data types.
You will notice that there are 2 steps already predefined by the selecting we did on the previous screens. We will be adding one more step to this query that simply returns the content of the first file in the container. To do this…
- Right click on the Navigation step and select Insert step after
- You can change the name or leave it as Custom, it's up to you
- In the formula for that step, set the command to:
Navigation{0}[Content] - Hit enter
Next we are going to create a new query that will act as a parameter to be used as dataflow iterates over the files. Right now this parameter will reference our Sample File query created above. To do this…
- Click on Get data, scroll down and select Blank Query
- Rename the query to Sample File Parameter1
- Set the command to:
#"Sample File" meta [IsParameterQuery=true, BinaryIdentifier=#"Sample File", Type="Binary", IsParameterQueryRequired=true] - Hit enter
Since we are using CSV files for this example, the next query we create will utilize the parameter created above to define a CSV file output based on the binary data supplied via the sample file and the parameter. To do this…
- Click on Get data, scroll down and select Blank Query, click Next
- Rename the query to Transform Sample File from Chicago Inspection Files
- Set the command for step Source to:
Csv.Document(#"Sample File Parameter1", [Delimiter = ",", Columns = 17, Encoding = 1252, QuoteStyle = QuoteStyle.None]) - Right click on the Source step and choose Insert step after
- Set the command of the new Custom step to:
Table.PromoteHeaders(Source, [PromoteAllScalars = true]) - This tells dataflow that the first row of the data is the column header name
- Hit enter
You should now have 3 queries in the left explorer, with the last one being a table representation of the CSV file with the proper column headings. Now we need to create a function that will loop over all the files in the BLOB container. To do this…
- Click on Get data, scroll down and select Blank Query, click Next
- Rename the query to Transform Sample File from Chicago Inspection Files
- Set the command for step Source to:
(#"Sample File Parameter1") => let Source = Csv.Document(#"Sample File Parameter1",[Delimiter=",", Columns=17, Encoding=1252, QuoteStyle=QuoteStyle.None]), #"Promoted Headers" = Table.PromoteHeaders(Source, [PromoteAllScalars=true]) in #"Promoted Headers" - Hit enter
The last step in the dataflow will be the single output query that calls the function to loop over the files and combine them into a single source. Here we will also be modifying some of the column names as well as referencing the sample file to pull in all the column metadata. To do this…
- Click on Get data, scroll down and select Blank Query, click Next
- Rename the query to Chicago Inspection Source Files
- Set the command for step Source to:
AzureStorage.Blobs("swcdaadlgen2storage") - Right click on step Source and choose Insert step after
- Set the command of the new Custom step to:
Source{[Name = "local-file-copy-test"]}[Data] - Right click on step Custom and choose Insert step after
- Rename the new step to Filtered Hidden Files1
- Set the command of the new Filtered Hidden Files1 step to:
Table.SelectRows(Custom, each [Attributes]?[Hidden]? <> true) - Right click on step Filtered Hidden Files1 and choose Insert step after
- Rename the new step to Invoke Custom Function1
- Set the command of the new Invoke Custom Function1 step to:
Table.AddColumn(#"Filtered Hidden Files1", "Transform File from Chicago Inspection Source Files", each #"Transform File from Chicago Inspection Source Files"([Content])) - Right click on step Invoke Custom Function1 and choose Insert step after
- Rename the new step to Renamed Columns1
- Set the command of the new Renamed Columns1 step to:
Table.RenameColumns(#"Invoke Custom Function1", {"Name", "Source.Name"}) - Right click on step Renamed Columns1 and choose Insert step after
- Rename the new step to Removed Other Columns1
- Set the command of the new Removed Other Columns1 step to:
Table.SelectColumns(#"Renamed Columns1", {"Source.Name", "Transform File from Chicago Inspection Source Files"}) - Right click on step Removed Other Columns1 and choose Insert step after
- Rename the new step to Expanded Table Column1
- Set the command of the new Expanded Table Column1 step to:
Table.ExpandTableColumn(#"Removed Other Columns1", "Transform File from Chicago Inspection Source Files", Table.ColumnNames(#"Transform File from Chicago Inspection Source Files"(#"Sample File"))) - Right click on step Expanded Table Column1 and choose Insert step after
- Rename the new step to Changed Type
- Set the command of the new Changed Type step to:
Table.TransformColumnTypes(#"Expanded Table Column1", {{"Source.Name", type text}, {"Inspection ID", Int64.Type}, {"DBA Name", type text}, {"AKA Name", type text}, {"License #", Int64.Type}, {"Facility Type", type text}, {"Risk", type text}, {"Address", type text}, {"City", type text}, {"State", type text}, {"Zip", Int64.Type}, {"Inspection Date", type datetime}, {"Inspection Type", type text}, {"Results", type text}, {"Violations", type text}, {"Latitude", type number}, {"Longitude", type number}, {"Location", type text}})
At this point you are done setting up your dataflow. Click on Save & Close. This will validate all your queries and save them. Once it is done saving, click Close on the Entities page. Now that the dataflow is created and saved, you can either click on the Refresh icon or setup a refresh schedule to populate your entities.
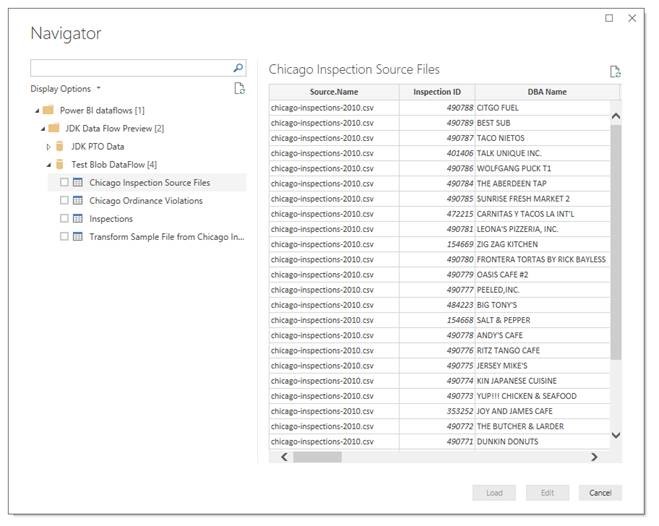
Open up Power BI desktop and click on Get Data. Power BI Dataflows is one of the available options. Select it and login to the account you create your dataflow under. Choose the Chicago Inspection Source Files entity and click Load.
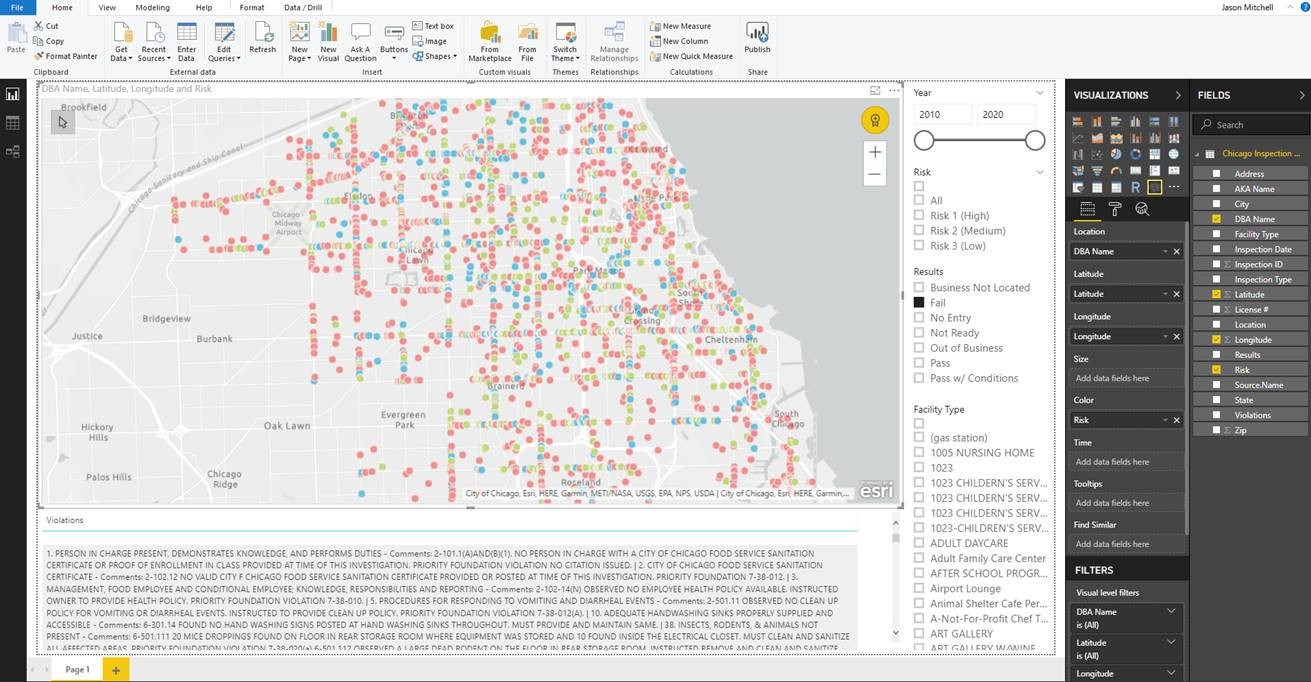
You can now access the data and create a report like the example below.
SHARE